Managed Apple Pay Integration
In the Managed integration, our platform acts as the PSP and takes full responsibility for the Apple Pay configuration, including merchant identifiers, payment processing certificates, and the Apple Pay button rendering on the hosted payment page.
Merchants do not integrate the Apple Pay API directly. All Apple Pay configuration and tokenization is handled by our platform.
Managed Apple Pay must be enabled for your merchant account. Contact your onboarding manager to activate this service.
Benefits
- No certificate management — Our platform handles all Apple Pay merchant identifiers and payment processing certificates.
- No frontend integration — The Apple Pay button is rendered automatically on the hosted payment page.
- No token handling — Merchants do not handle, decrypt, or validate Apple Pay payment tokens.
- Simplified checkout — Create a checkout session and redirect — that's it.
How It Works
- Customer initiates a transaction on the merchant's website or app.
- Merchant creates a checkout session via the Checkout API.
- OneAPI returns the checkout session details including a redirect URL.
- Merchant redirects the customer to the Hosted Payment Page.
- Customer clicks the Apple Pay button and authenticates via Face ID, Touch ID, or passcode.
- Apple returns encrypted payment data to OneAPI.
- OneAPI processes the payment.
- Customer is redirected to
success_urlorerror_url. - OneAPI sends a webhook notification to the merchant's
postback_url. - Merchant updates order status and displays final confirmation to the customer.
Payment Flow
Merchant Onboarding
With the Managed integration, our platform handles the Apple Pay configuration and certificate management. The merchant onboarding process is simplified compared to the unmanaged integration.
Steps
- Contact your onboarding manager — Request activation of Managed Apple Pay for your merchant account.
- Provide your business details — Your onboarding manager will confirm which information is required (e.g. business name, website URL).
- Receive confirmation — Once activated, Apple Pay will be available as a payment option on your Hosted Payment Page.
What our platform handles
- Apple Developer account configuration and merchant identifier setup
- Payment processing certificate creation and management
- Domain verification and merchant validation
- Apple Pay API integration and frontend button rendering
What the merchant handles
- Providing business information to the onboarding manager
- Integrating the Checkout API to create checkout sessions
- Redirecting customers to the Hosted Payment Page
If you prefer to manage Apple Pay certificates and configuration yourself, see the Apple Pay — Unmanaged Integration documentation, which includes a full Merchant Onboarding Guide.
Enabling Apple Pay (Managed)
Apple Pay must be enabled for your merchant account by our platform. Once enabled:
- Create a checkout session using the Checkout API.
- Redirect customers to the payment page generated by our platform.
No additional frontend integration or SDK implementation is required.
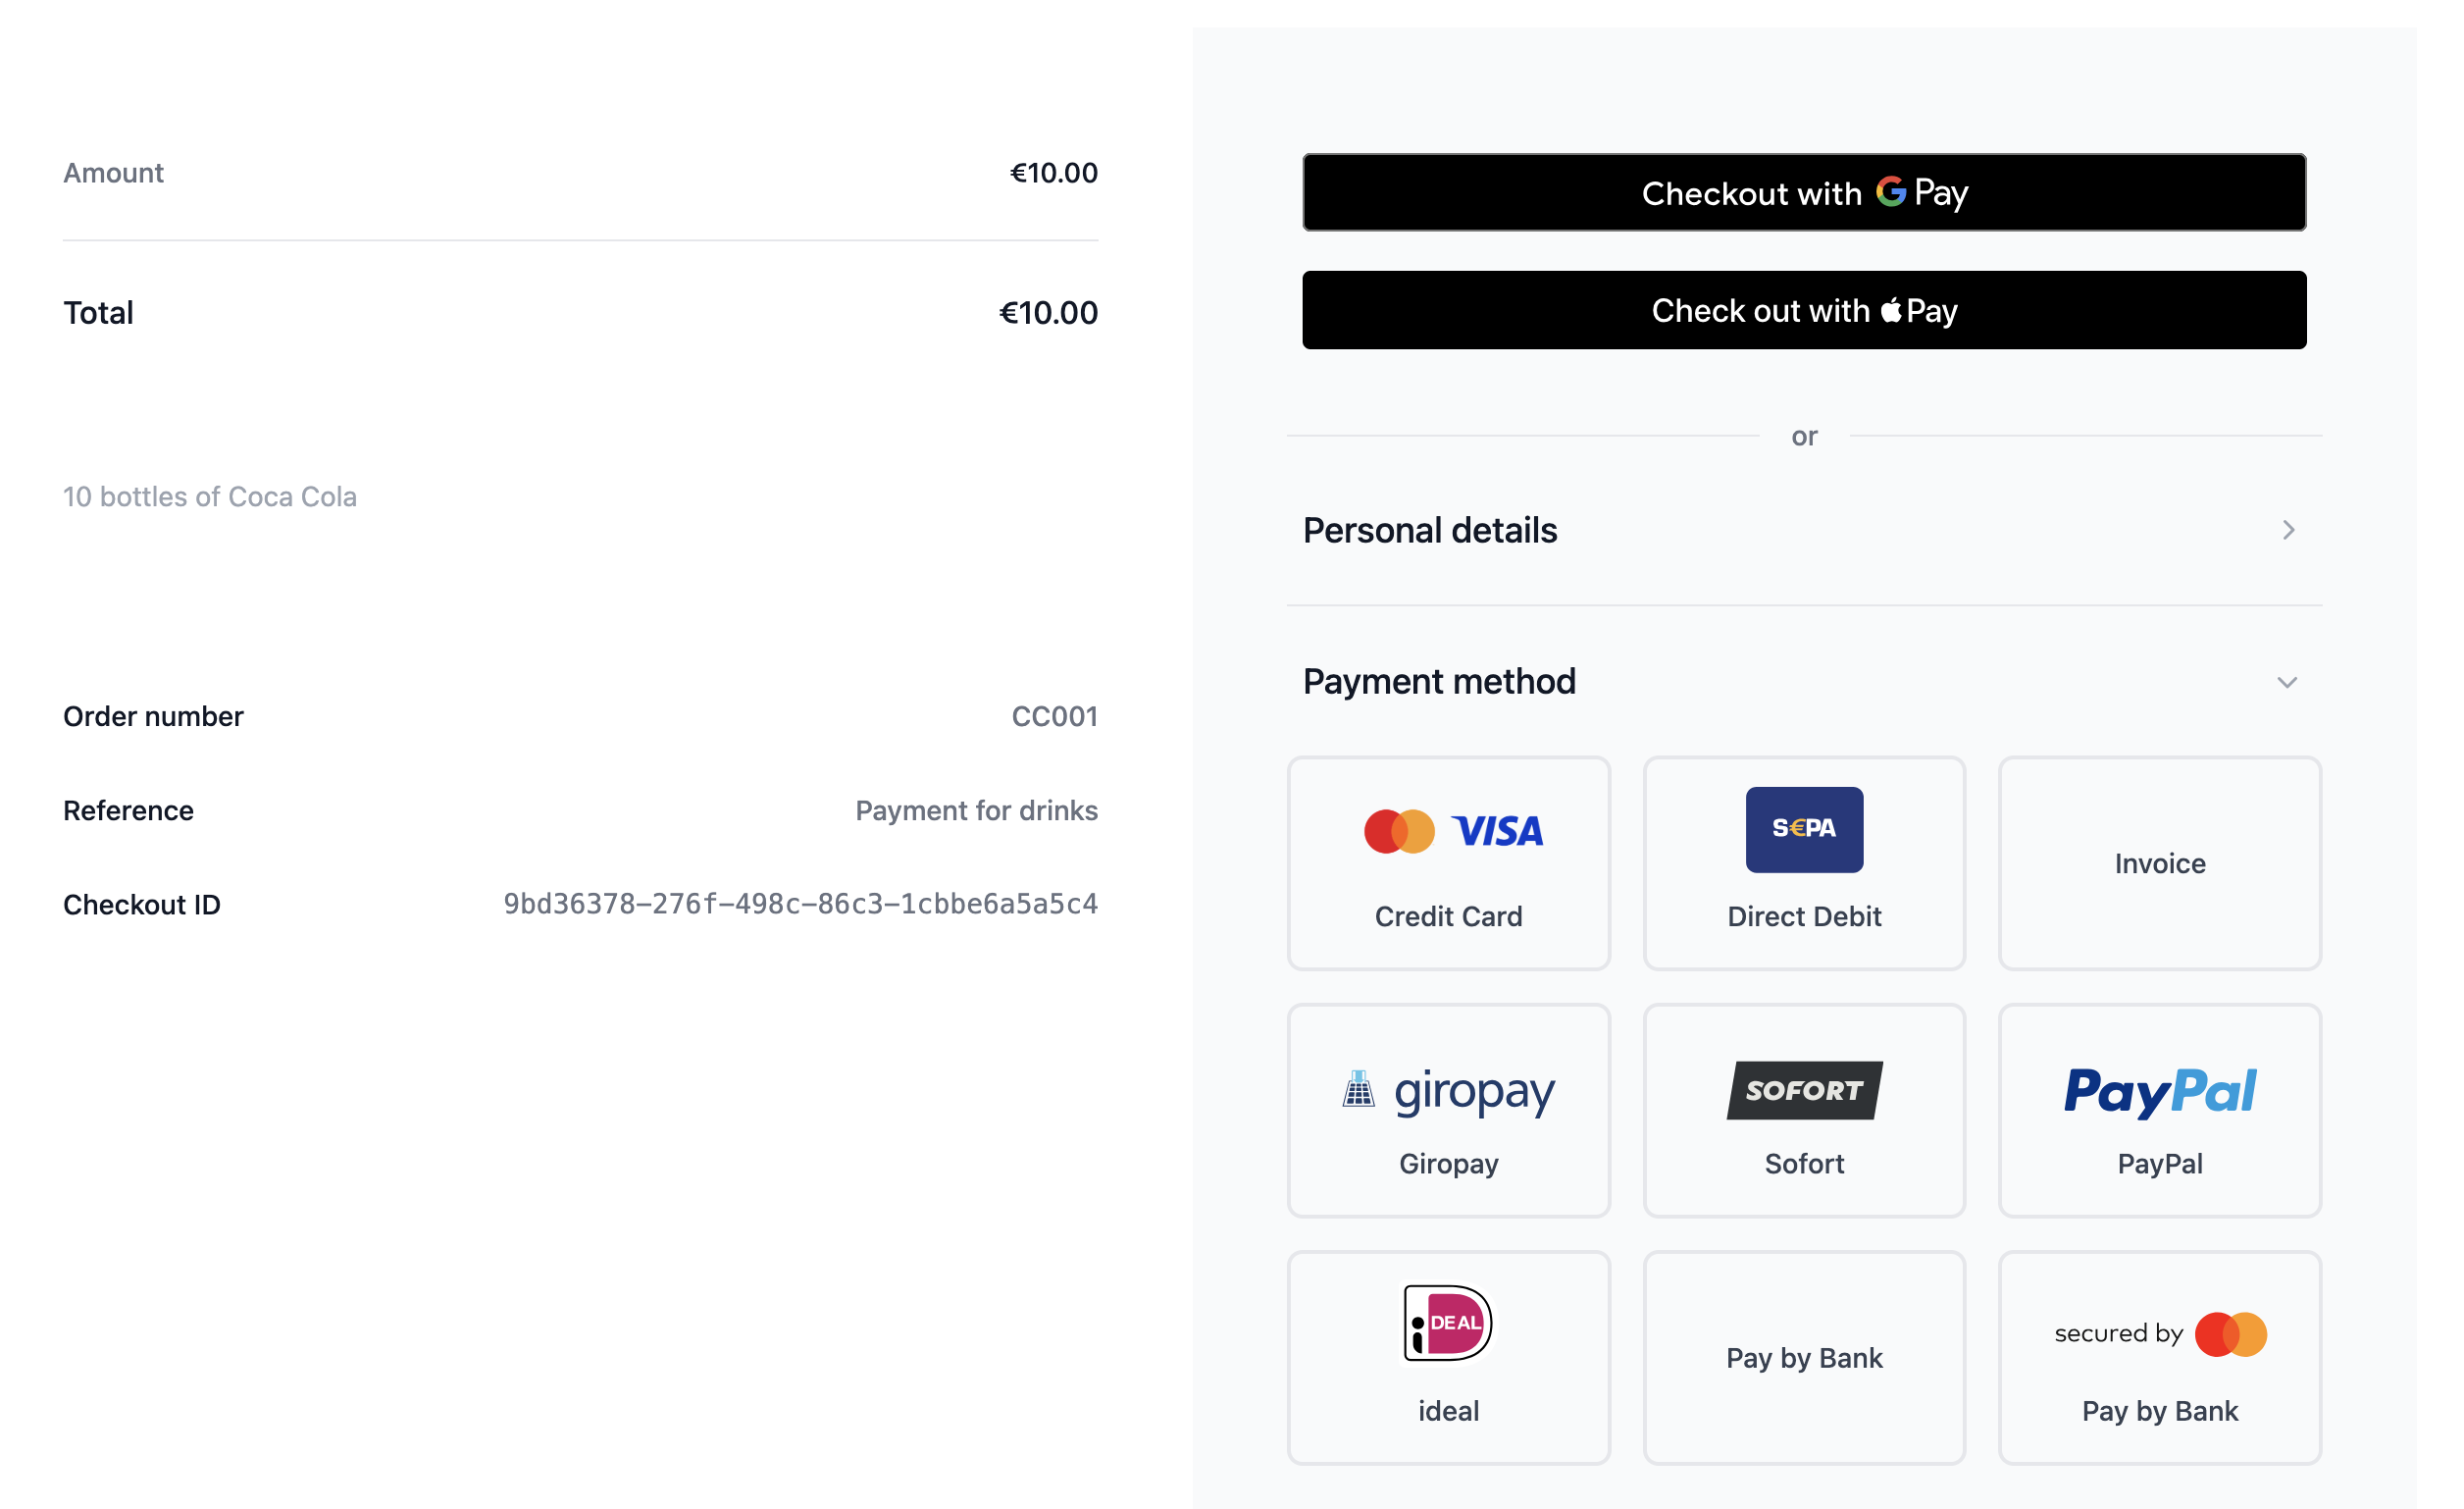
Below is an example of the Hosted Payment Page as seen by the customer, with Apple Pay available as a payment option.
Checkout API Request
merchant_nameStringrequiredorder_idStringrequiredreferenceStringdescriptionStringcurrencyStringrequiredamountFloatrequiredtotal_amountFloatrequiredsuccess_urlStringrequirederror_urlStringrequiredpostback_urlStringrequiredPOST /rest/checkouts
Authorization: Basic <base64(api_key:api_password)>
Content-Type: application/json
{
"merchant_name": "Your Shop Name",
"order_id": "APAY-12345",
"reference": "Apple Pay Order",
"description": "Payment for order APAY-12345",
"currency": "EUR",
"amount": 25.90,
"total_amount": 25.90,
"success_url": "https://your-success.url.com",
"error_url": "https://your-error.url.com",
"postback_url": "https://your-postback.url.com"
}
Checkout API Response
checkout_idStringerror_codeIntegerstatusStringclient_actionStringaction_dataObjecturl — the checkout page URL to redirect the customer to{
"checkout_id": "7a87a507-91e8-4882-9b2d-19f35434d946",
"error_code": 0,
"status": "open",
"client_action": "redirect",
"action_data": {
"url": "https://testapi.betterpayment.de/rest/checkouts/7a87a507-91e8-4882-9b2d-19f35434d946"
}
}
Standard Integration
If you prefer to manage Apple Pay certificates and frontend integration yourself, see the Apple Pay payment method documentation.