Managed Google Pay Integration
In the Managed integration, our platform acts as the PSP and takes full responsibility for the Google Pay configuration, including the gateway identifier, gatewayMerchantId, tokenization parameters, and the Google Pay button rendering.
Merchants do not integrate the Google Pay API directly. All Google Pay request objects and tokenization parameters are generated and handled by our platform.
Managed Google Pay must be enabled for your merchant account. Contact your onboarding manager to activate this service.
Benefits
- No Google Pay API integration — Our platform handles all Google Pay configuration and tokenization settings.
- No frontend integration — The Google Pay button is rendered automatically on the hosted payment page.
- No token handling — Merchants do not handle, decrypt, or validate Google Pay payment tokens.
- Simplified checkout — Create a checkout session and redirect — that's it.
- 3DS handled automatically — When using the
PAN_ONLYauthorization method, 3DS is fully managed by our platform.
How It Works
- Customer initiates a transaction on the merchant's website or app.
- Merchant creates a checkout session via the Checkout API.
- OneAPI returns the checkout session details including a redirect URL.
- Merchant redirects the customer to the Hosted Payment Page.
- Customer clicks the Google Pay button and authenticates via their Google account.
- Google returns encrypted payment data to OneAPI.
- OneAPI processes the payment.
- Customer is redirected to
success_urlorerror_url. - OneAPI sends a webhook notification to the merchant's
postback_url. - Merchant updates order status and displays final confirmation to the customer.
Payment Flow
Merchant Onboarding
With the Managed integration, our platform handles the Google Pay configuration and API setup. The merchant onboarding process is simplified compared to the unmanaged integration.
Steps
- Contact your onboarding manager — Request activation of Managed Google Pay for your merchant account.
- Provide your business details — Your onboarding manager will confirm which information is required (e.g. business name, website URL).
- Receive confirmation — Once activated, Google Pay will be available as a payment option on your Hosted Payment Page.
What our platform handles
- Google Pay & Wallet Console registration and configuration
- Gateway identifier (
gateway) and merchant identifier (gatewayMerchantId) setup - Google Pay API integration and domain registration
- Buyflow screenshot submission and approval process
- Tokenization parameters and frontend button rendering
What the merchant handles
- Providing business information to the onboarding manager
- Integrating the Checkout API to create checkout sessions
- Redirecting customers to the Hosted Payment Page
If you prefer to manage Google Pay registration and configuration yourself, see the Google Pay — Unmanaged Integration documentation, which includes a full Merchant Onboarding Guide.
Enabling Google Pay (Managed)
Google Pay must be enabled for your merchant account by our platform. Once enabled:
- Create a checkout session using the Checkout API.
- Redirect customers to the payment page generated by our platform.
No additional frontend integration or SDK implementation is required.
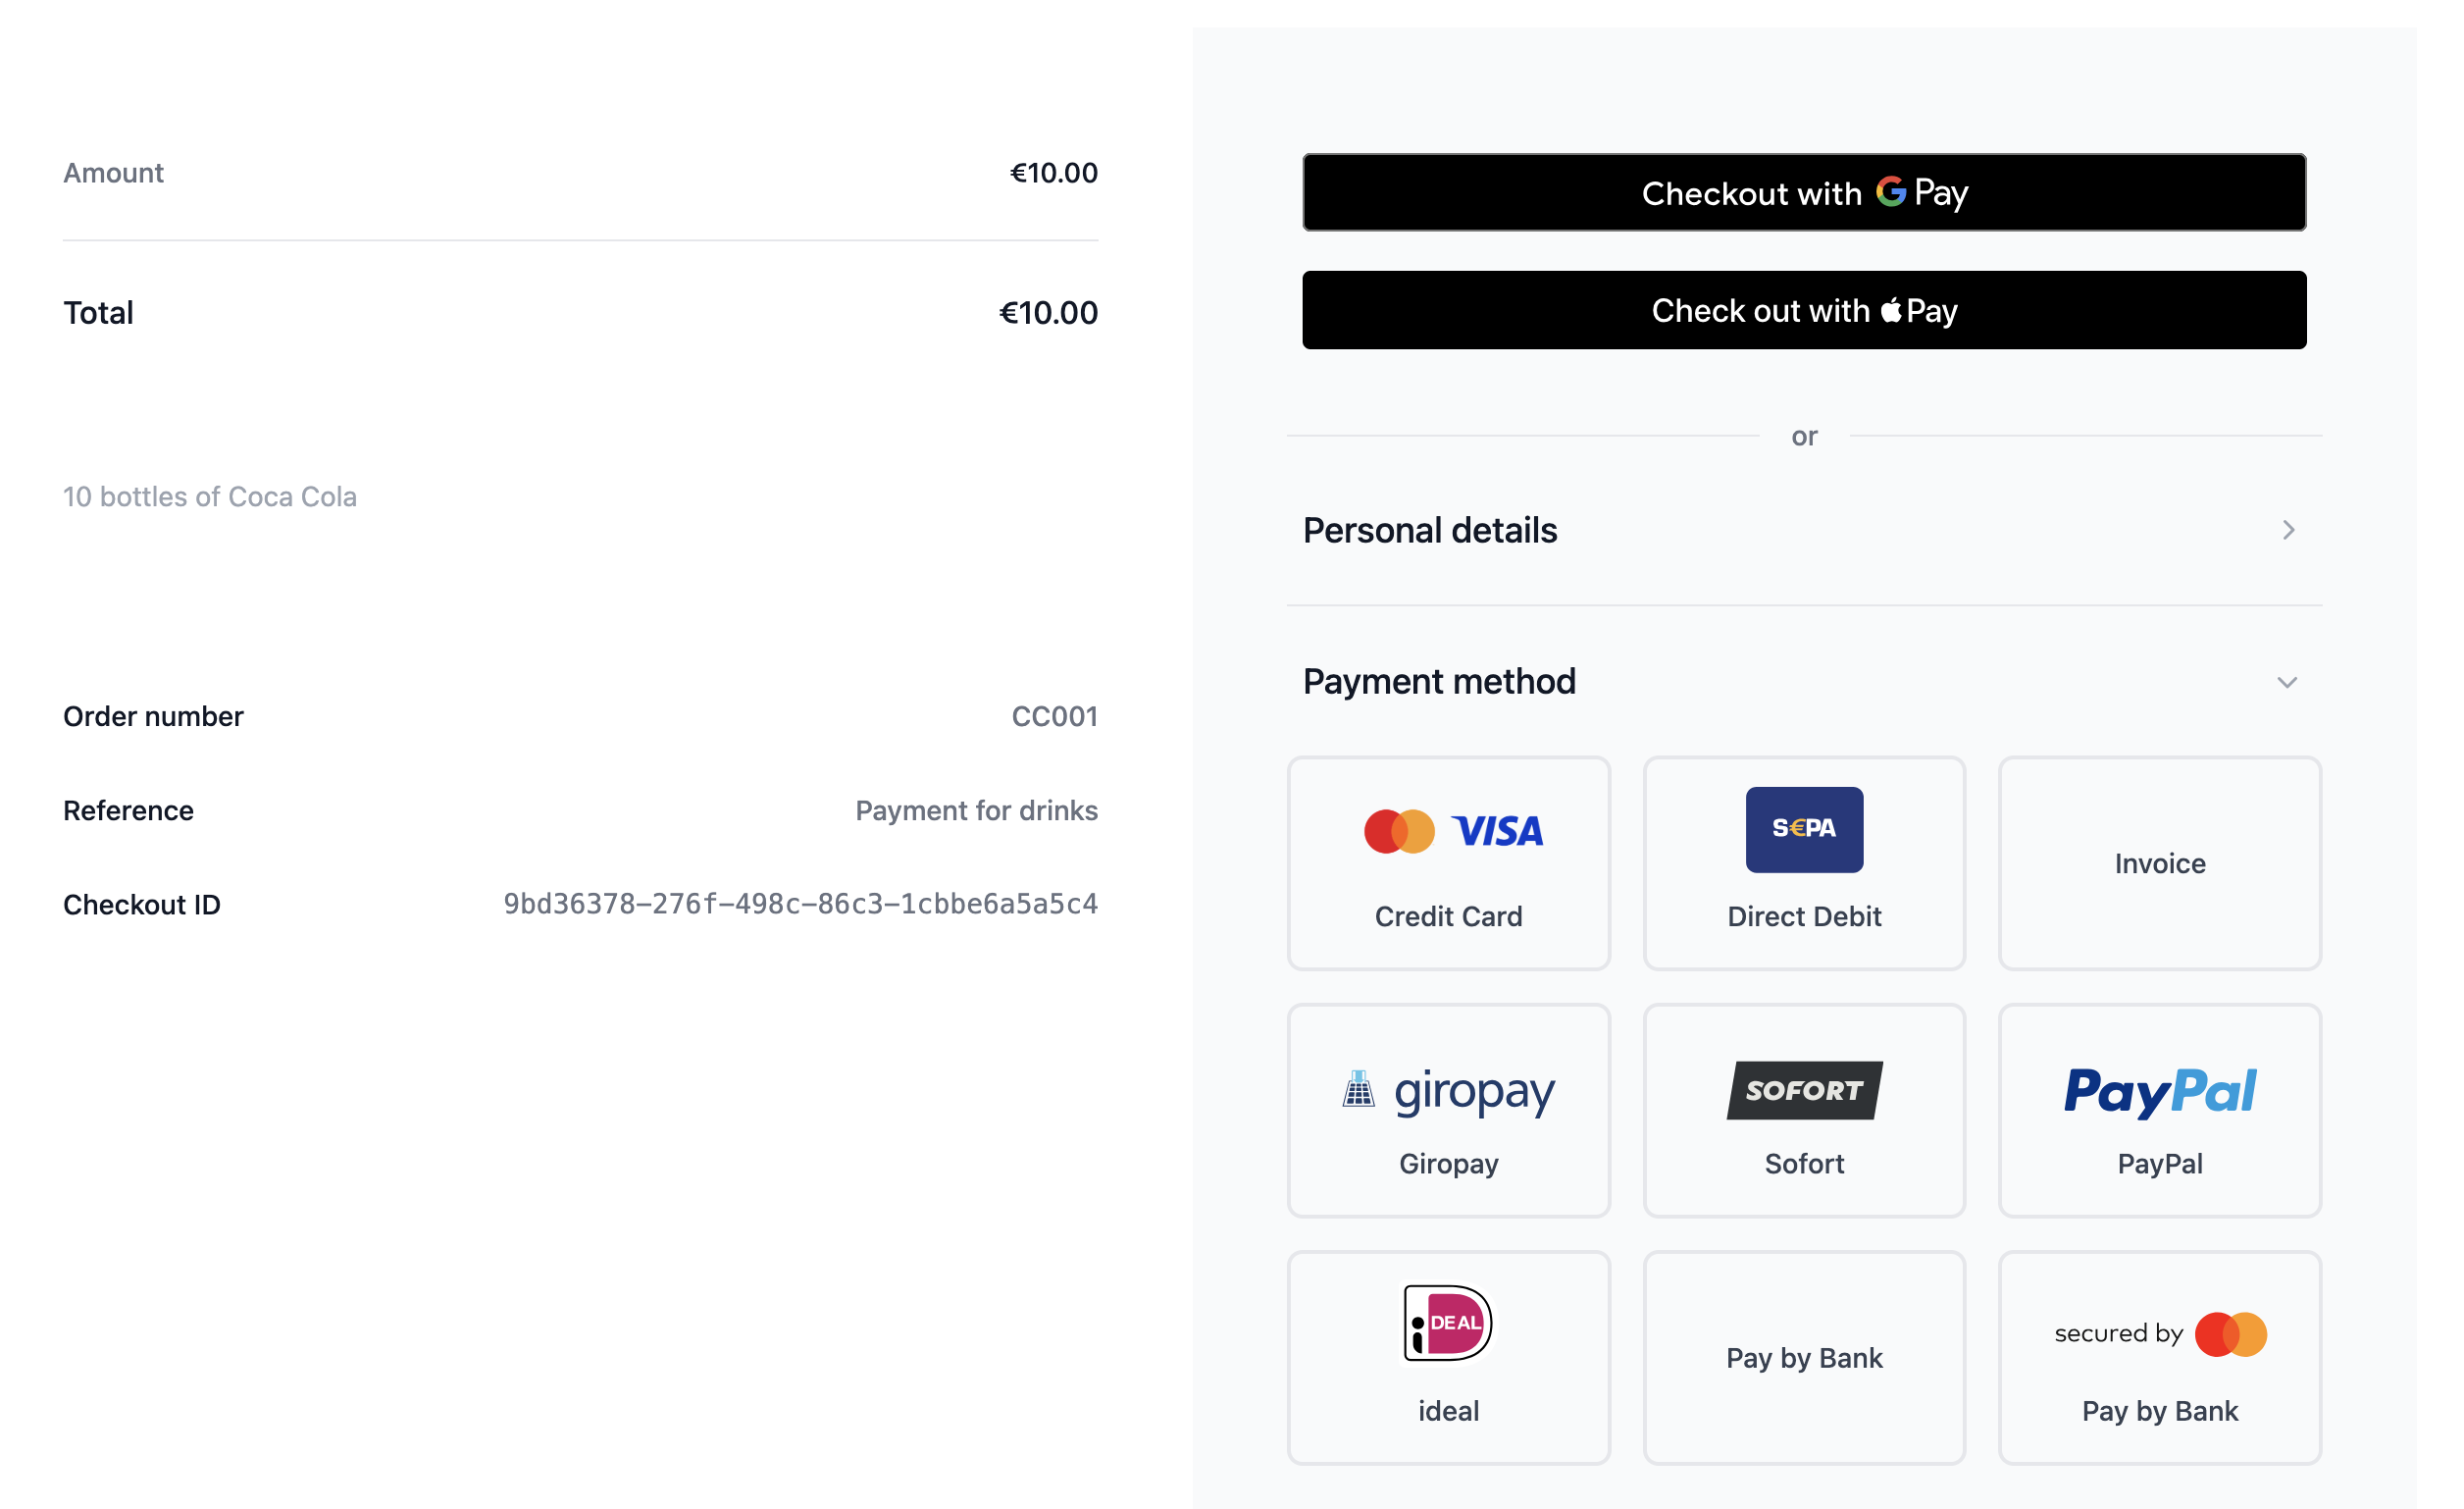
Below is an example of the Hosted Payment Page as seen by the customer, with Google Pay available as a payment option.
Authorization Methods
Google Pay supports two authorization methods, both enabled by default:
- CRYPTOGRAM_3DS — The payment includes a wallet cryptogram. No additional 3DS authentication is required.
- PAN_ONLY — 3DS authentication may be required. In the Managed integration, 3DS handling is fully managed by our platform.
Tokenization Configuration
The following values are configured and managed by our platform:
gateway— Identifier assigned to our platform during Google Pay onboarding.gatewayMerchantId— Merchant-specific identifier assigned by our platform.
When using the Managed integration, merchants do not need to configure these values manually.
Checkout API Request
merchant_nameStringrequiredorder_idStringrequiredreferenceStringdescriptionStringcurrencyStringrequiredamountFloatrequiredtotal_amountFloatrequiredsuccess_urlStringrequirederror_urlStringrequiredpostback_urlStringrequiredPOST /rest/checkouts
Authorization: Basic <base64(api_key:api_password)>
Content-Type: application/json
{
"merchant_name": "Your Shop Name",
"order_id": "GPAY-12345",
"reference": "Google Pay Order",
"description": "Payment for order GPAY-12345",
"currency": "EUR",
"amount": 25.90,
"total_amount": 25.90,
"success_url": "https://your-success.url.com",
"error_url": "https://your-error.url.com",
"postback_url": "https://your-postback.url.com"
}
Checkout API Response
checkout_idStringerror_codeIntegerstatusStringclient_actionStringaction_dataObjecturl — the checkout page URL to redirect the customer to{
"checkout_id": "7a87a507-91e8-4882-9b2d-19f35434d946",
"error_code": 0,
"status": "open",
"client_action": "redirect",
"action_data": {
"url": "https://testapi.betterpayment.de/rest/checkouts/7a87a507-91e8-4882-9b2d-19f35434d946"
}
}
Standard Integration
If you prefer to manage Google Pay configuration and frontend integration yourself, see the Google Pay payment method documentation.